Huddly Canvas installation guide
Here are the steps for setting up Huddly Canvas.
Before you begin, you will need the following (not included in the Canvas package):
- CAT 5e/6/7 Ethernet cable
- 4 screws suitable for your wall type (5 mm diameter, or #10 screw)
- Whiteboard up to 2 m x 1.2 m/6′ x 4′
Once you have all the necessary components, please follow these steps:
Placing the wall bracket
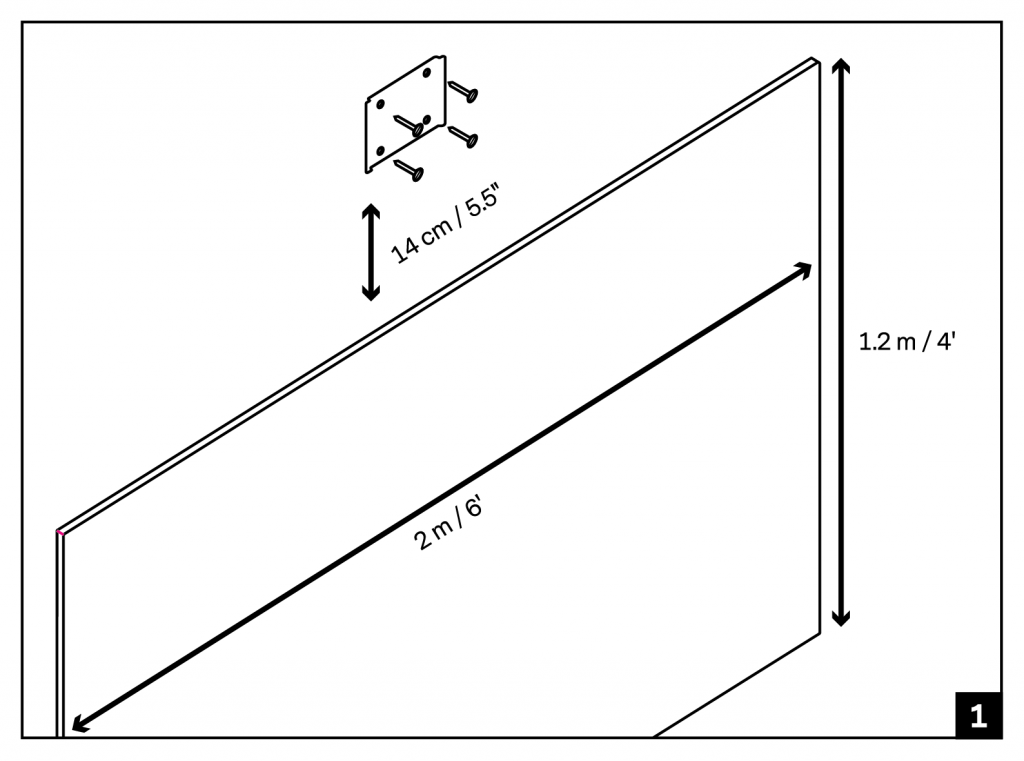
- Place the wall bracket 14 cm/5.5″ above the center of your whiteboard.
- Mount the wall bracket with the tabs facing out.
- Secure the wall bracket using four screws.
Connect the Huddly Canvas camera
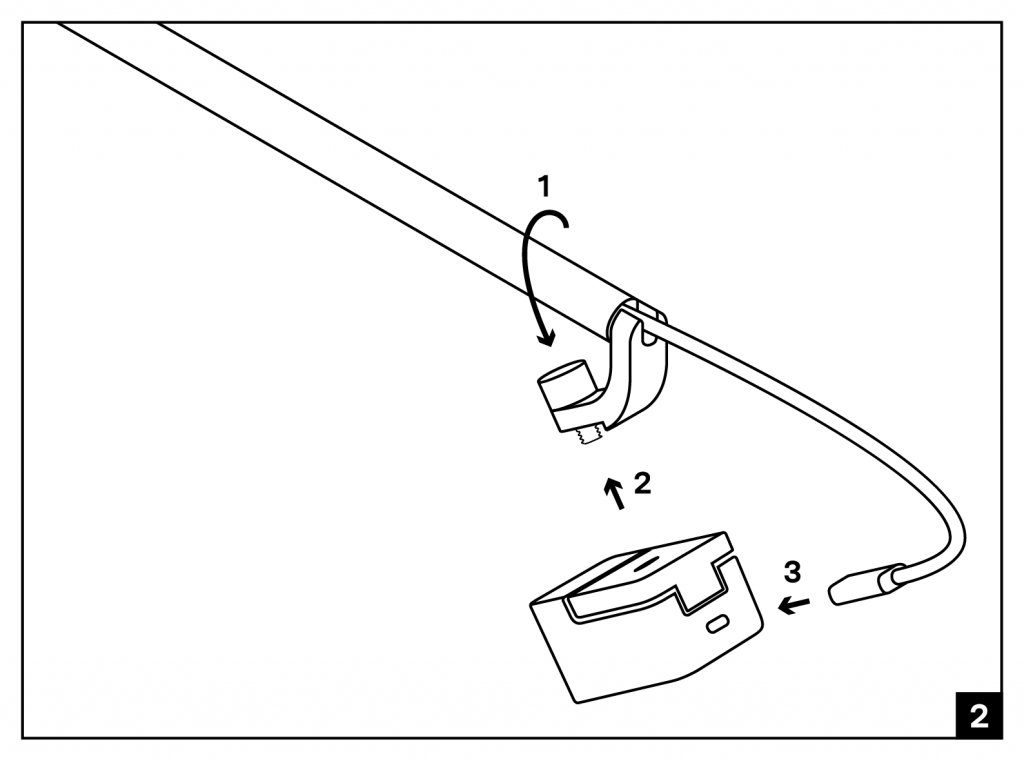
- Rotate the camera arm so that it points down.
- Fasten the Huddly Canvas camera with the camera screw.
- Connect the USB cable to the camera.
Place the housing to the wall bracket
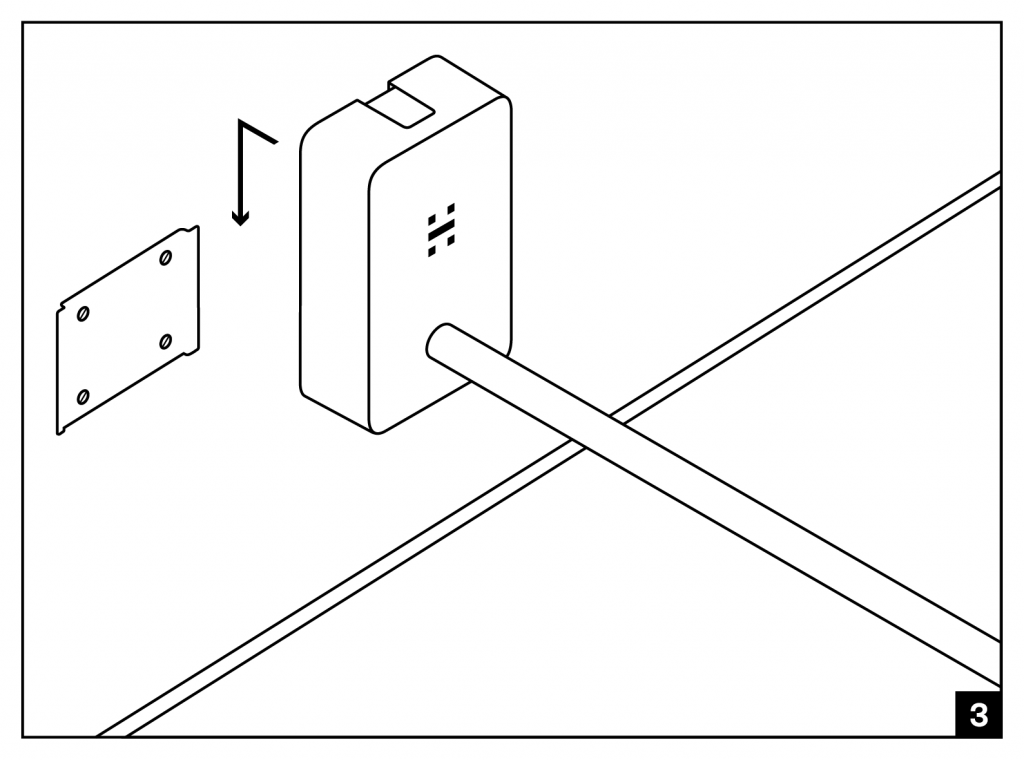
- Place the Canvas housing over the wall bracket and slide it down carefully until it is safely in place.
Connect the Ethernet cable
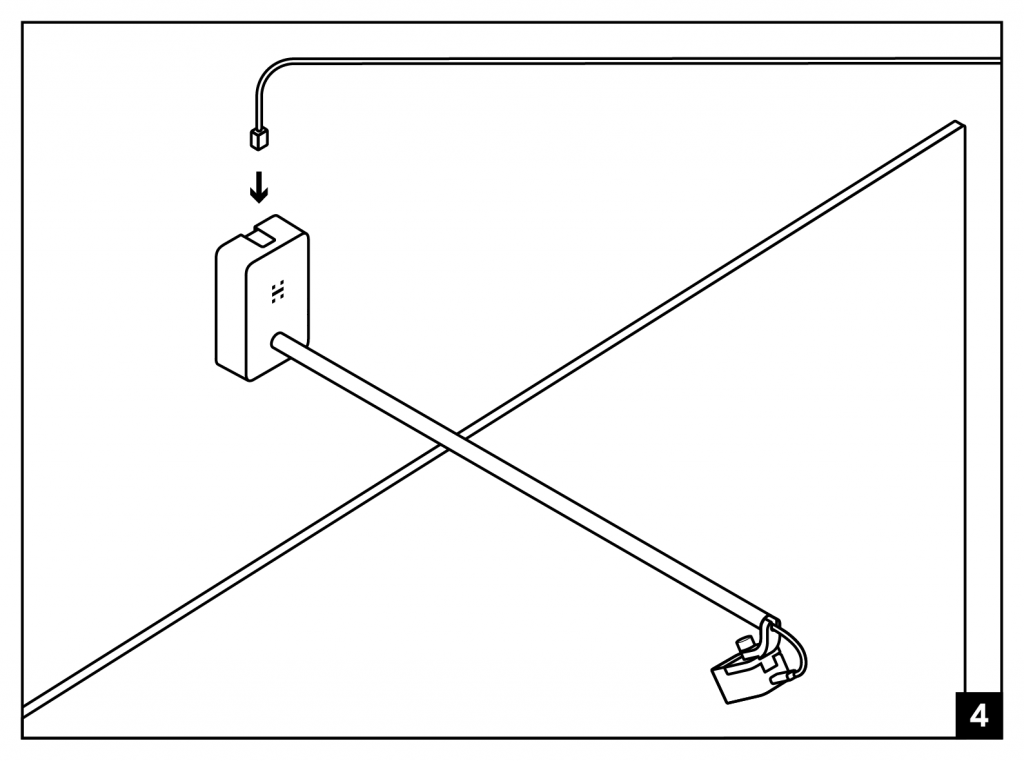
- Connect your Ethernet cable to the top of the Canvas housing.
Connect the cables
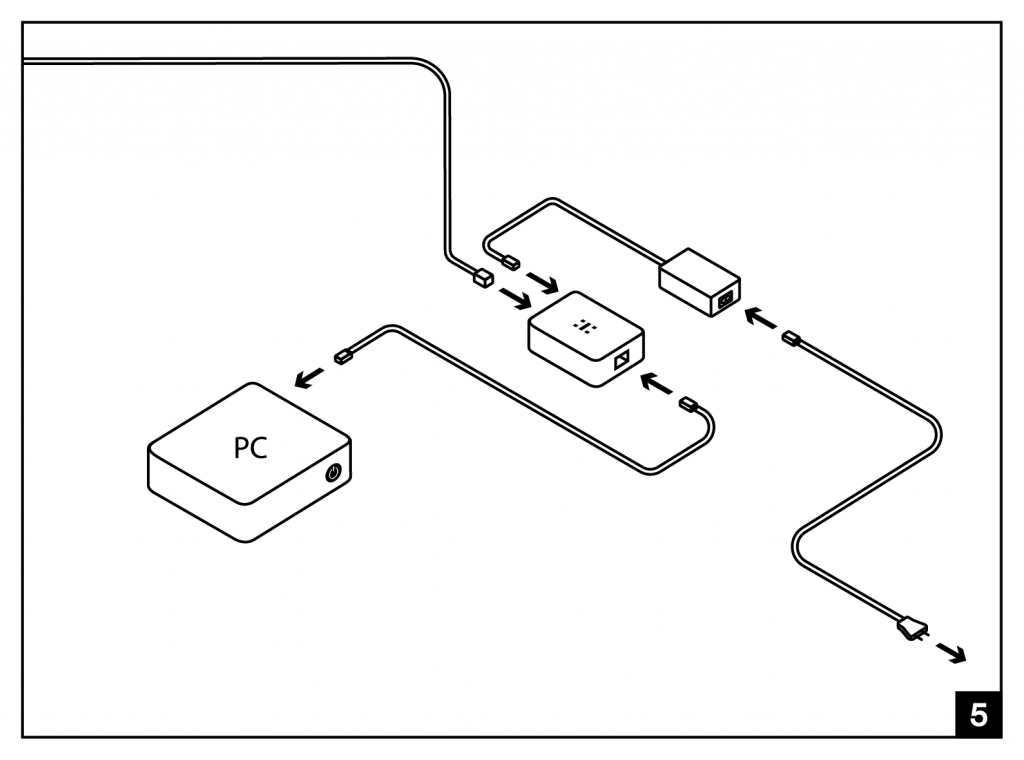
- Connect the other side of the Ethernet cable to the included USB extender.
- Use the included USB cable to connect the USB extender to your meeting room computer.
- Connect the AC Power Adapter to the USB extender and a power socket.
Finish the installation
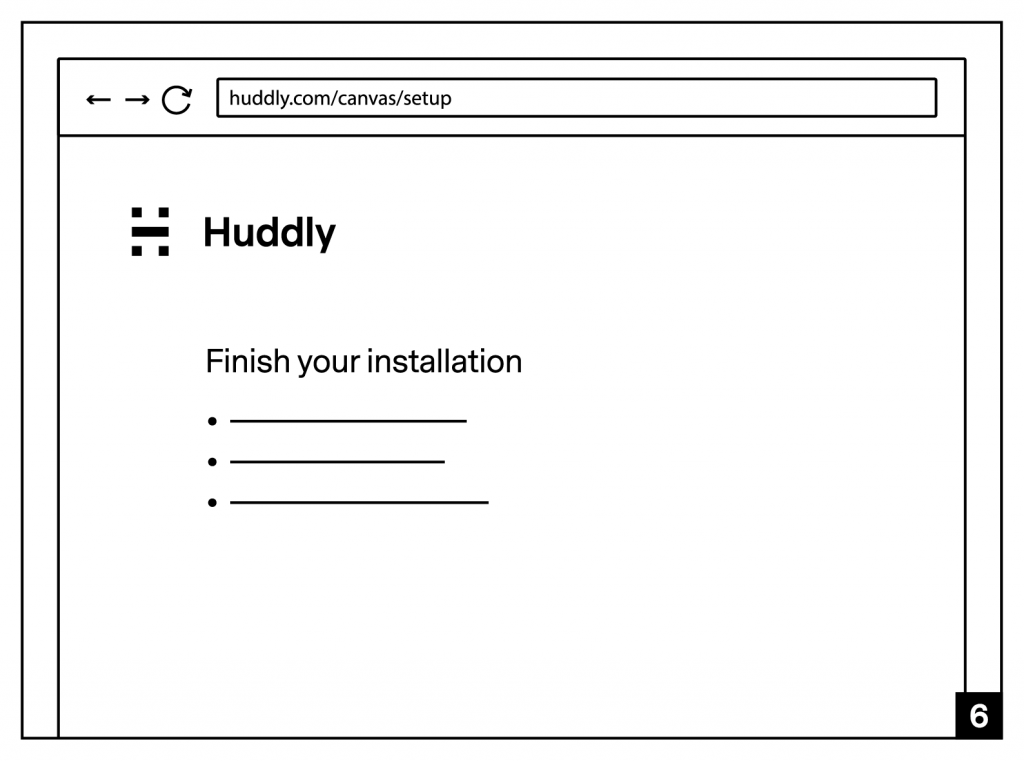
- To finish the installation, visit huddly.com/canvas/setup .
You can see the attached PDF for visuals.